Archive for the ‘Android’ Category

How to de-Google your Android phone

First, download a ROM from this Russian message board. It’s okay! You can totally verify the GPG signature. Allow yourself 30 minutes to remember how GPG works, then verify that forum poster LeetAndrej420 has indeed signed the file.

Next, root your Android phone. You will need to hold the volume-up and power buttons for ten seconds, then unplug from USB, then reboot a few times after you mess it up, then give up and download the Android dev tools.

After you figure out the Android adb and fastboot commands, you should see a friendly UI with green Courier text on a black background. Press the button that says, “I void my warranty and completely exonerate the OEM in the likely event that I am actually pwning myself by installing random software from the internet onto a tracking device I carry in my pocket every day.” But it’s okay. You trust Andrej, right?

Next you will need to install the “recovery” tool. Despite the name, this is actually the best way to brick your device. Luckily it is incredibly feature-rich, boasting 12 buttons on the home screen, including an “Advanced” button containing more buttons. These buttons will invite you to do things like “clear the Dalvik/ART cache,” which you totally know what that means.

When you download the recovery tool, make sure you get the right version for your phone! Of course, it’s not named after your phone’s brand name, but rather a cheeky internal name chosen by the OEM, like “bacon”, “cheeseburger”, or “mahimahi”. The professionalism on display from all parties should fill you with confidence.

You will download the recovery tool from a site called SickWarez.biz. Use GPG to ensure that it’s signed by Andrej.

Once downloaded, go into recovery mode and install the ROM, being careful to press the one correct button out of 12, like a game of Minesweeper that will brick your phone if you lose. This will also factory-reset your device, which is fine because all your photos and contacts are backed up to your Google account… ah, right. You’ll want to do something about that.

Assuming you have successfully installed the ROM without turning your phone into a $700 doorstop, you can now install apps. Thankfully there is F-Droid, which hosts all your favorite open-source apps. Wait, your favorite apps aren’t open-source? Well, at least it has Signal. Wait, it doesn’t have Signal?

Once you’ve installed the Yalp Store, which sideloads apps from Google Play in a way that may or may not be totally illegal and will get blocked by Google once they read this blog post and realize that it exists, you can now download some actually useful apps.

Thankfully, though, your personal data will be safe and secure from third-party developers, because these apps will not work. Be prepared for error messages like, “Please install Google Maps,” “Google Play Services required,” or “What kind of sicko has a Google phone without Google? What is wrong with you?”

After all this ceremony, you can now relax and enjoy your Google-free Android device. Note, though, that weather widgets, GPS, push notifications, and the majority of Android apps you rely on will not work. That said, there are some great note-taking apps! Plus SMS will still work. Good old SMS.

So now that you’ve successfully turned your $700 Android device into a glorified $30 Nokia flip phone, which may or may not be siphoning your passwords to a Ukrainian teenager, you can finally have a Google-free smartphone experience. Or you could just buy an iPhone.

Living with an open-source phone

A few months ago, I decided to make a radical change to my smartphone lifestyle. I wanted a phone that would limit the amount of personal data I was broadcasting to third parties – namely Apple or Google – and decided to run a more-or-less vanilla version of Android, without any Google Play Services (i.e. no Google Maps, GMail, Google Play, or Google Search apps).

I’ve been living with this setup for a few months, and to my surprise, it’s really not that bad. It doesn’t feel like a return to the Stone Age, nor does it feel like I’ve sacrificed all the niceties of a smartphone to the point where I’m carrying around a glorified flip phone.

However, it’s a bit non-obvious how to get all of this stuff to work, and especially how to get by with a Android phone that doesn’t have the Google Play Store. So in this post, I’d like to talk a bit about my smartphone setup, in the hope that it might help someone who’s looking to make a similar switch.

Choosing an Android ROM

There are various flavors of Android out there: you can choose LineageOS (the spiritual successor to CyanogenMod), Paranoid Android, CopperheadOS, or you can even just build AOSP (the Android Open Source Project) from source.

After fumbling around with building AOSP from source (which was much more difficult than I thought – lots of requirements for the build environment, CPU horsepower, and storage), I also tried LineageOS and CopperheadOS, and eventually settled on LineageOS.

Why LineageOS? Well, mostly because it was easy, it offered fast security updates, and I like the minimalist interface and built-in apps. LineageOS was also familiar to me, as I had previously used Cyanogen for many years. (I forgot how much I enjoyed the small creature comforts, such as long-pressing the volume up/down keys to skip tracks!)

Screenshot of default homescreen on LineageOS

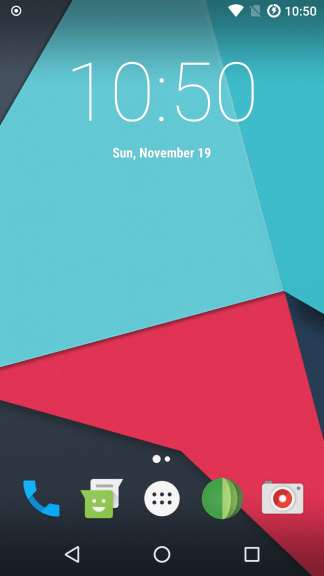
Default homescreen on LineageOS

I also needed a recovery image in order to install the ROM, and it seems that TWRP has become the de-facto standard these days, replacing the venerated ClockworkMod.

As it turns out, none of these options will result in a 100% open-source phone, as you’ll still be running the vendor binaries for your particular phone. But this is about as close as you can get to a smartphone that runs only free/libre open-source software.

Choosing a phone and installing a ROM

This isn’t going to be a guide to unlocking or rooting your Android phone. The process is different for every phone, and it would take too long to describe all the various steps. Suffice it so say that it’s still a painful process, and your choice of phone can either make it easier or harder.

I’ve been rooting, unlocking, and tinkering with Android phones for a long time, since the days of the HTC Dream and HTC Magic around 2009/2010. Since then, I’ve worked as an Android and mobile web developer, and I’ve become very comfortable with tools like the Android SDK, adb, fastboot, and Android Studio. And yet, to this day I still find installing custom ROMs to be a frustrating and time-consuming experience. I wish it were easier for casual folks to do this stuff.

The Nexus line of phones (now Pixel) have always been the easiest to customize, and for many years I stuck with the tried-and-true Nexus 5, which is still a surprisingly capable phone despite having been released in 2013. (I swear it ran faster than my 5X, which also kicked the bucket after only a year or two of use.) However, my aging Nexus 5 just couldn’t cut the mustard anymore due to hardware issues (the USB port was too loose; it had become tricky to charge it), and so I decided to buy a new phone instead.

I settled on the Samsung Galaxy S5, mostly because I could get it for cheap (<$200 on Amazon) and with full support for my carrier (T-Mobile). In retrospect, choosing a non-Nexus device made my life a lot harder, and after several hours of research on unlocking Samsung phones (including building Heimdall from source on a Windows machine, because the prebuilt binaries were out of date but the software was too old to build on a Mac), I finally had my LineageOS phone up and running.

The second thing you'll want to do is ensure that your device is encrypted, which you can enable in the security settings. Unfortunately this ended up making my phone unable to start the OS, but after booting into recovery and doing a factory reset, I had both encryption and the OS up and running just fine.

Screenshot of my LineageOS home screen

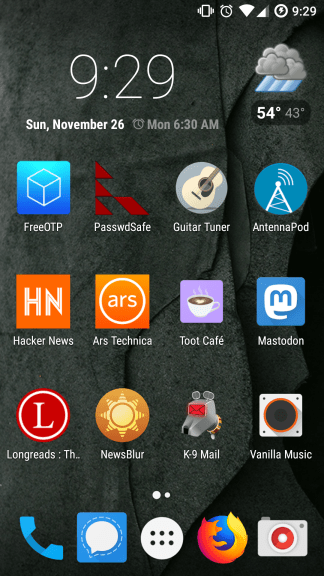
My LineageOS home screen

Getting apps

Without the Google Play Store, you'll have to use F-Droid, which has the added benefit of only hosting free and open-source apps. In fact, a couple of my own apps were previously on there (Catlog and KeepScore), and as far as I can tell, they were built directly from source. (I’m not sure why they were removed; possibly because I stopped maintaining them.)

To get F-Droid, you just download it directly from f-droid.org. You'll also have to allow installation from "unknown sources" in the security settings.

For the odd app that isn't available on F-Droid, you can also use the Yalp Store, which can either use your Google account or an ephemeral account to download apps from the Play Store. It’s not clear to me whether or not this violates the Google Play Terms of Service, though, so proceed with caution.

Messaging

I use Signal as my default SMS app and for most messaging with family and friends. Unfortunately it isn't available on F-Droid, but you can download it directly from the Signal website, or use the Yalp Store technique above.

Update: if you’re wondering how to verify the SHA256 fingerprint of the APK downloaded from the Signal website, here’s an example.

Like most Android apps, Signal normally uses Firebase Cloud Messaging (FCM, formerly GCM) to send push notifications. If you don't have Google Play Services installed, Signal will offer to switch to a less battery-efficient background polling mechanism.

I've used this mechanism for months and only had occasional problems where a large backlog of old messages was suddenly delivered all at once. It also hasn't had a visible impact on battery life. (I usually end the day with half a charge left; the GS5 has a great battery!)

Web browser

For a web browser, I mainly use Firefox via the FFUpdater tool, which is clunky but gets the job done. I’ve set DuckDuckGo as my default search engine, and I have uBlock Origin installed as an add-on, which undoubtedly makes my browsing faster and easier on the battery.

Occasionally though, I do find sites that don’t run so will with mobile Firefox, and for that I use Auto Updater for Chromium, which automatically installs Chromium and updates it. This is a bit nicer than FFUpdater because it does its work silently in the background, rather than requiring you to manually check for updates.

The built-in browser doesn’t support “Add to Homescreen,” so I find it fairly useless.

Maps

I use OsmAnd~, which is nice because it allows you to download maps in advance for offline use. Unfortunately it’s still nowhere near as feature-complete as Google Maps, so if you’re looking for something to help you navigate your car, you may be out of luck. (Update: actually, OsmAnd~ supports turn-by-turn navigation.)

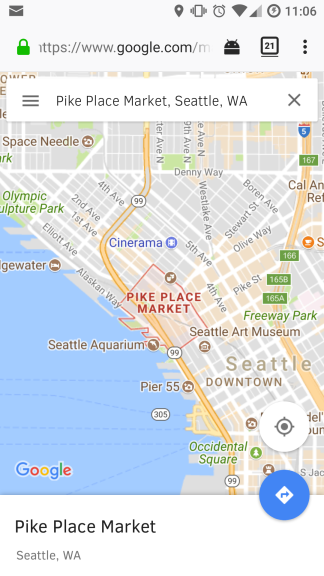
I also frequently use maps.google.com in Firefox, which works surprisingly well. Besides some minor performance issues, it’s fairly indistinguishable from the native app for basic directions, bus timetables, and store lookups.

Screenshot of Google Maps running in Firefox

Google Maps running in Firefox

Living in Seattle, one of my favorite apps is also OneBusAway, which provides up-to-date arrival times for Seattle buses. Unfortunately this app requires Google Play Services in order to work, so I’ve had to do without.

Weather

Speaking of Seattle, it’s also important for me to know how much it’s going to rain in a given day. (Spoiler alert: a lot.)

This happens to be one of those things about LineageOS that’s a bit non-intuitive. To get weather to work, you have to go to the “extras” page and download a weather provider. (In my case, I’m using OpenWeatherMap.)

Unfortunately, though, even after installing the weather provider, I couldn’t get the built-in “cLock” widget to show the weather. (It keeps saying “network geolocation is disabled,” even though it’s not.) So I ended up installing Forecast widgets, which gets its data from the National Weather Service rather than the built-in weather provider.

Maybe this is just some bug with my installation or with the hardware itself, but in any case I’m satisfied with this workaround. The Forecast widget looks and works fine.

Screenshot of weather and time widget on my homescreen

Weather and time widget on my homescreen

Keyboard

The only non-standard features I really want from a keyboard are 1) emoji support, and 2) swipe input.

Unfortunately I couldn’t find any open-source keyboard that can do both of these things, and the AOSP keyboard doesn’t seem to support either. The closest I found was AnySoftKeyboard, which at least has an emoji screen. It doesn’t allow you to search for emoji, though, which is a bit frustrating.

Screenshot of sending an emoji via AnySoftKeyboard and Signal

Sending an emoji via AnySoftKeyboard and Signal

Overall, the keyboard experience has been my least favorite part of the LineageOS experience. I didn’t realize how much I had become accustomed to swipe input until I had to revert back to tapping, which feels to me like hunt-and-peck. Input is extremely laborious and slow, although on the plus side I’m spending less time texting, so maybe that’s a good thing.

Update: actually, AnySoftKeyboard does support searching emoji! You just need to type : and then the search term.

Music and podcasting

I’m a fairly old-school music consumer. I prefer to listen to albums from start to finish, and I never really got into services like Pandora or Spotify. Instead, I buy my MP3s from Amazon (old habit, my entire library is there) and then sync them from my desktop computer to my phone using adb-sync.

For browsing and listening to my music library, I’ve found Vanilla Music to be fantastic. It has a cover art downloader, the interface is minimal and clean, and it can play an album from start to finish, which is all I really ask.

Screenshot of Vanilla Music with some of my albums

Vanilla Music with some of my albums

Oh, and of course Vanilla Music sets the cover art on the lock screen. It’s the little things that count.

I’m also something of a podcast addict, so I use AntennaPod to download and listen to podcasts. I’ve tried several podcast apps on F-Droid, and I found this one to be the easiest and most reliable overall. I particularly like that it allows me to search on iTunes, since some podcasts can be hard to find elsewhere.

Social media

I stopped using Twitter, but if you absolutely must, their mobile website is not bad in either Firefox or Chromium. I’m told Facebook’s mobile website is also pretty functional.

I spend most of my social media time these days on Mastodon, and as it turns out the mobile websites work perfectly fine in both Firefox and Chrome, so you can just pin it to your homescreen. There’s also Tusky if you prefer the native app experience.

Ridesharing

I don’t use Uber, but Lyft has a mobile webapp that works just as well as their native app. So when I need a ride, I just open ride.lyft.com in Firefox. It’s a PWA, and as far as I can tell it works just as well as the native Android app.

Somewhat bafflingly, though, if you go to lyft.com directly, the site may try to route you to their driver portal or to the app store instead.

Screenshot of Lyft's website offering "Lyft in Firefox,"

Lyft’s website may offer “Lyft in Firefox,” which is the PWA

In case you get confused, you may need to look for the “Lyft in Firefox” link. To me, this seems like a bizarre way of saying “Lyft for the web,” but you do you, Lyft.

Email, calendar, and contacts

I switched to FastMail recently for my primary email account, and I’ve been really happy with the service. It’s fast, it’s simple, and it has a clear business model where I pay them 5 bucks a month and they host my email. Simple.

To get my email on my phone, I use K-9 Mail, as I’ve found it a bit more reliable and feature-rich than the built-in Email app. If you prefer a simpler interface, though, the built-in app works fine too.

FastMail also supports calendar and contact sync, and this is where it gets a bit trickier. If you’ve ever connected an email client to your email server by manually typing the IMAP and SMTP settings (which, incidentally, you’ll have to do for K-9 email), then it’ll feel pretty familiar. FastMail supports CalDav and CardDav, and so to hook these up to my phone I used DavDroid.

Honestly this was probably the most tedious process of setting up my LineageOS phone. It involved creating app passwords for each client (I use separate passwords for email, calendar, and contacts, in the interests of security), and manually typing in the server names and ports for the various FastMail endpoints. This was a long and error-prone process, but in the end I do have full email, calendar, and contact sync, so I can’t complain.

Passwords and two-factor auth

For nearly a decade I’ve stored my passwords using the Joel Spolsky method, which is to use PasswordGorilla on desktop and PasswdSafe on Android. I like this method because it’s simple, it works cross-platform, and I maintain control of the password file.

For two-factor authentication (other than basic SMS), there’s FreeOTP, which essentially takes the place of Google Authenticator.

The web works for everyone

One of my main reasons for switching to a non-Google Android phone was to see how capable the web is as an application delivery system. And aside from the native apps listed above and some minor utilities (e.g. a barcode scanner and a notes widget), I do pretty much everything in a web browser.

Media sources like Hacker News, Ars Technica, and others don’t need an app – you can just pin a website to your home screen. (Although for Hacker News, I use the excellent hn.premii.com.) The main exception for me is NewsBlur, which I access via the open-source client app.

For videos, both YouTube and Vimeo also work great as mobile webapps. In Firefox, they can run both in fullscreen mode and in the background.

For file sync, I use Dropbox’s mobile webapp for quick file downloads from my Dropbox account and Firefox Send for sending more ephemeral files. I need a better solution to backing up photos, though; for now I’m just using adb-sync to sync to my Dropbox folder on the desktop.

I also do work at Microsoft, and although I have a personal policy of not syncing my work email to my phone, I can make a temporary exception by loading outlook.office.com in Firefox, which works surprisingly well. For those odd moments when I need to send an email or check the location of a meeting, it gets the job done.

As a guitarist, I also needed a way to tune my guitar, and sadly the excellent g-strings is both paid and closed source, so it was a no-go. So I use Paul Lewis’ guitar tuning webapp instead, which is a good substitute.

Screenshot of guitar-tuner.appspot.com

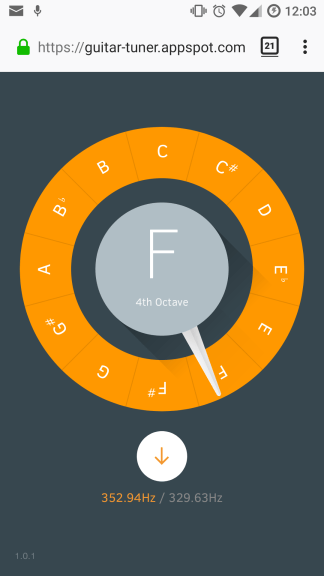
Me singing a bit off-key into a guitar tuner

Turns out the web of 2017 is capable of quite a bit, from hailing a taxi to tuning your guitar!

Conclusion

I hope I’ve demonstrated in this blog post that it’s not only possible to use an open-source phone without any of the pervasive tracking, spyware, or bloatware that we’ve come to expect from most smartphones, but it’s actually quite viable and even enjoyable.

When I booted up my Galaxy S5 for the first time, I was immediately greeted with a barrage of ads for Samsung and T-Mobile services and upsells, all in the 5 minutes it took to turn on USB debugging so I could install custom software and mercifully silence all of the nagware. My clean and stripped-down LineageOS setup is about as far from that horrendous out-of-the-box experience as you can get.

Note though, that this is the setup that works for me, and your mileage may vary depending on how much you rely on various software and services. If you use GMail and GDocs, you may be better off just using a Google-flavored Android phone. And if you’re bought into the iTunes and iCloud ecosystem, it may be more trouble than it’s worth to switch from an iPhone.

Also, despite my attempts to de-mystify some of the less obvious parts of this setup, I’m in no way claiming that any of this is accessible to the non-geek, non-hacker crowd. The mere process of installing LineageOS is so far beyond the capabilities of the average non-techie that it actually fills me with a kind of despair.

This is probably a subject for an entire post, but I’m becoming concerned that my friends and I in the open-source, pro-privacy hacker scene are building a two-tiered world, where the tech elite can successfully install and configure software that maintains their security and privacy, whereas the average person is stuck either paying a premium for a privacy-respecting but closed-source iPhone, or paying a reasonable price for an Android phone where their security and privacy are far from assured.

That said, maybe if more of us inhabit this (admittedly neophyte-unfriendly) world, then maybe we can work to make it more accessible to those of us who don’t know how to use a command line and have no patience to type out IMAP server URLs into their smartphone. Let’s hope so.

What happened to PouchDroid?

Just in case anyone is wondering about PouchDroid, a few things changed since I started working on it three months ago:

  1. I found out CouchBase Lite exists. So you may want to try that instead of some crazy JavaScript thing.
  2. I started working on PouchDB itself.

I do plan on eventually updating PouchDroid, but for the time being there’s still plenty to be done in PouchDB. Long-term goals will be:

  1. API parity with PouchDB (at least, the important parts).
  2. Get a rigorous suite of tests in place.
  3. Once the tests are passing, port it to pure Java.

If you still want to use PouchDroid in a Cordova/PhoneGap app, I’d recommend using PouchDB itself and the SQLite plugin instead. PouchDroid uses a slightly modified version of the SQLite plugin, which probably won’t give you any noticeable performance improvements. As for the XHR overrides, I’ll probably take that out, so you should just set up CORS on your CouchDB.

If you want to use PouchDroid in a Java Android project, it’s still pretty nifty for small sync tasks (e.g. the PouchDroidMigrationTask, which can sync a SQLite database to CouchDB). But if you want something more full-featured and reliable, wait for 1.0.

PouchDroid v0.1.0 is out!

PouchDroid

PouchDroid

I’ve managed to nail down the bulk of the API for PouchDroid, and I’m releasing a super-tentative 0.1.0 version today, just in time for Christmas.

Obligatory caveat: Please do not use it in production yet. God no, not yet. Your user’s data is more precious to me than that.

Do go try it out, though! There’s now a well-thought-out README and a “Getting Started” tutorial. And a dorky logo I made in GIMP. (Aw yeah.)

So, it’s official: PouchDB’s empire has spread to Android. And now that JavaScript is a first-class citizen on iOS, could that platform be far behind?

Porting PouchDB to Android: initial work and thoughts

Update: CouchDroid has been renamed to PouchDroid, and I’ve released version 0.1.0. The code examples below are out of date. Please refer to the instructions and tutorials on the GitHub page.

I love PouchDB. It demonstrates the strength and flexibility of CouchDB, and since it supports both WebSQL and IndexedDB under the hood, it obviates the need to learn their separate APIs (or to worry about the inevitable browser inconsistencies). If you know CouchDB, you already know PouchDB.

And most importantly, it offers two-way sync in just a few lines of code. To me, this is magical:

var db = new PouchDB('mydb')
db.replicate.to('http://foo.com:5984/db', {continuous : true});
db.replicate.from('http://foo.com:5984/db', {continuous : true});

I wanted to bring this same magic to Android, so I started working on an Android adapter for PouchDB. I’m calling it CouchDroid, until I can think of a better name. The concept is either completely crazy or kinda clever, which is why I’m writing this post, in the hopes of getting early feedback.

The basic idea is this: instead of rewriting PouchDB in Java, I fire up an invisible WebView that runs PouchDB in JavaScript. I override window.openDatabase to redirect to the native Java SQLite APIs, so that all of the SQL queries run on a background thread (instead of tying up the UI thread, like they normally would). I also redirect XMLHttpRequest into Java, giving me control over the HTTP request threads, and helping avoid any messy server-side configuration of CORS/JSONP for web security.

Result: it works on a fresh CouchDB installation, no assembly required. And it’s actually pretty damned fast.

The code is still a little rough around the edges, but it can already do bidirectional sync, which is great. Callbacks look weird in Java, but static typing, generics, and content assist make the Pouch APIs a dream to work with. (My precious Ctrl+space works!)

Here’s an example of bidirectional sync between two Android devices and a CouchDB server using CouchDroid. First, we define what kinds of documents we want to sync by extending PouchDocument. This is Android, so let’s store some robots:

public class Robot extends PouchDocument {

  private String name;
  private String type;
  private String creator;
  private double awesomenessFactor;
  private int iq;
  private List<RobotFunction> functions;

  // constructors, getters, setters, toString...
}
public class RobotFunction {

  private String name;

  // constructors, getters, setters, toString...
}

I’m using Jackson for JSON serialization/deserialization, which means that your standard POJOs “just work.” The PouchDocument abstract class simply adds the required CouchDB fields _id and _rev.

In our Activity, we extend CouchDroidActivity (needed to set up the Java <-> JavaScript bridge), and we add a bunch of robots to a PouchDB<Robot>:

public class MainActivity extends CouchDroidActivity {

  private PouchDB<Robot> pouch;

  // onCreate()...

  @Override
  protected void onCouchDroidReady(CouchDroidRuntime runtime) {

    pouch = PouchDB.newPouchDB(Robot.class, runtime, "robots.db");

    List<Robot> robots = Arrays.asList(
      new Robot("C3P0", "Protocol droid", "George Lucas", 0.4, 200, 
        Arrays.asList(
          new RobotFunction("Human-cyborg relations"),
          new RobotFunction("Losing his limbs"))),
      new Robot("R2-D2", "Astromech droid", "George Lucas", 0.8, 135,
        Arrays.asList(
          new RobotFunction("Getting lost"),
          new RobotFunction("Having a secret jetpack"),
          new RobotFunction("Showing holographic messages")))    
    );

    pouch.bulkDocs(robots, new BulkCallback() {

        @Override
        public void onCallback(PouchError err, List<PouchInfo> info) {
          Log.i("Pouch", "loaded: " + info);
        }
    });
  }
}

Meanwhile, on another Android device, we load a completely different list of robots:

List<Robot> robots = Arrays.asList(
  new Robot("Mecha Godzilla", "Giant monster", "Toho", 0.4, 82, 
    Arrays.asList(
      new RobotFunction("Flying through space"),
      new RobotFunction("Kicking Godzilla's ass"))),
  new Robot("Andy", "Messenger robot", "Stephen King", 0.8, 135,
    Arrays.asList(
      new RobotFunction("Relaying messages"),
      new RobotFunction("Betraying the ka-tet"),
      new RobotFunction("Many other functions"))),
  new Robot("Bender", "Bending Unit", "Matt Groening", 0.999, 120,
    Arrays.asList(
      new RobotFunction("Gettin' drunk"),
      new RobotFunction("Burping fire"),
      new RobotFunction("Bending things"),
      new RobotFunction("Inviting you to bite his lustrous posterior")))
  );

And, of course, we set up bidirectional replication on both pouches:

String remoteCouch = "http://user:password@myhost:5984/robots";
Map<String, Object> options = Maps.quickMap("continuous", true);

pouch.replicateFrom(remoteCouch, options);
pouch.replicateTo(remoteCouch, options);

Wait a few seconds (or pass in a callback), and voilà! You can check the contents on CouchDB:
C3P0 on CouchDB

And then check the contents of each PouchDB on Android:

pouch.allDocs(true, new AllDocsCallback<Robot>() {

@Override
  public void onCallback(PouchError err, AllDocsInfo<Robot> info) {
    List<Robot> robots = info.getDocuments();
    Log.i("Pouch", "pouch contains " + robots);
  }
});

This prints:

pouch contains [Robot [name=Bender, type=Bending Unit, creator=Matt Groening, 
awesomenessFactor=0.999, iq=120, functions=[RobotFunction [name=Gettin' drunk], RobotFunction 
[name=Burping fire], RobotFunction [name=Bending things], RobotFunction [name=Inviting you to bite 
his lustrous posterior]]], Robot [name=C3P0, type=Protocol droid, creator=George Lucas, 
awesomenessFactor=0.4, iq=200, functions=[RobotFunction [name=Human-cyborg relations], RobotFunction 
[name=Losing his limbs]]], Robot [name=Mecha Godzilla, type=Giant monster, creator=Toho, 
awesomenessFactor=0.4, iq=82, functions=[RobotFunction [name=Flying through space], RobotFunction 
[name=Kicking Godzilla's ass]]], Robot [name=R2-D2, type=Astromech droid, creator=George Lucas, 
awesomenessFactor=0.8, iq=135, functions=[RobotFunction [name=Getting lost], RobotFunction 
[name=Having a secret jetpack], RobotFunction [name=Showing holographic messages]]], Robot 
[name=Andy, type=Messenger robot, creator=Stephen King, awesomenessFactor=0.8, iq=135, functions=
[RobotFunction [name=Relaying messages], RobotFunction [name=Betraying the ka-tet], RobotFunction 
[name=Many other functions]]]]

So within seconds, all five documents have been synced to two separate PouchDBs and one CouchDB. Not bad!

In addition to adapting the PouchDB API for Java, I also wrote a simple migration tool to mirror an existing SQLite database to a remote CouchDB. It could be useful, if you just want a read-only web site where users can view their Android data:

new CouchDroidMigrationTask.Builder(runtime, sqliteDatabase)
    .setUserId("fooUser")
    .setCouchdbUrl("http://user:password@foo.com:5984/db")
    .addSqliteTable("SomeTable", "uniqueId")
    .addSqliteTable("SomeOtherTable", "uniqueId")
    .setProgressListener(MainActivity.this)
    .build()
    .start();

This converts SQLite data like this:

sqlite&gt; .schema Monsters
CREATE TABLE Monsters (_id integer primary key autoincrement, 
  uniqueId text not null,
  nationalDexNumber integer not null,
  type1 text not null,
  type2 text,
  name text not null);
sqlite&gt; select * from Monsters limit 1
1|001|1|Grass|Poison|Bulbasaur

into CouchDB data like this:

{
   "_id": "fooUser~pokemon_11d1eaac.db~Monsters~001",
   "_rev": "1-bd52d48dba37ce490c38d455726296f0",
   "table": "Monsters",
   "user": "fooUser",
   "sqliteDB": "pokemon_11d1eaac.db",
   "appPackage": "com.nolanlawson.couchdroid.example1",
   "content": {
       "_id": 1,
       "uniqueId": "001",
       "nationalDexNumber": 1,
       "type1": "Grass",
       "type2": "Poison",
       "name": "Bulbasaur"
   }
}

Notice that the user is included as a field and as part of the _id, so you can easily set up per-user write privileges. For per-user read privileges, you still need to set up one database per user.

CouchDroid isn’t ready for a production release yet. But even in its rudimentary state, I think it’s pretty damn exciting. As Android developers, wouldn’t it be great if we didn’t have to write so many SQL queries, and we could just put and get our POJOs? And wouldn’t it be awesome if that data were periodically synced to the server, so we didn’t even have to think about intermittent availability or incremental sync or conflict resolution or any of that junk? And wouldn’t our lives be so much easier if the data was immediately available in a RESTful web service like CouchDB, so we didn’t even need to write any server code? The dream is big, but it’s worth pursuing.

For more details on the project, check it out on GitHub. The sample apps in the examples directory are a good place to start. Example #1 is the migration script above, Example #2 is some basic CRUD operations on the Pouch API, and Example #3 is the full bidirectional sync described above. More to come!

Introducing the SuperSaiyanScollView: super-fast sectioned lists for Android

Update: This blog post is now out-of-date. Please see the official documentation on GitHub.

Say you’re writing an Android app, and you have a ListView you’d like to divide into sections:

Sectioned list views.

Sectioned list views.

Normally, you’d need to write a custom ListAdapter, where you define the resources yourself and juggle two different types of View. Not fun.

public class MyBoringAdapter<Foo> extends ArrayAdapter<Foo> {

    // constructors...
    
    public int getViewTypeCount() {
      return 2;
    }
    
    public int getItemViewType(int pos) {
      return isHeader(pos) ? 0 : 1;
    }

    // more boilerplate...
    
    public View getView(int pos, View view, ViewGroup parent) {
        if (isHeader(pos)) {
            // sigh
        } else {
            // so tired of this crap
        }
    }
}

Now, what happens if you want to change the ordering? Or add new sections? Or add fast-scroll overlays?

It’s one of the most common UI patterns in Android, and yet (surprisingly) it’s still a pain to implement. Nothing in the stock Android SDK provides this functionality.

Enter the SuperSaiyanScrollView (dramatic gong sound). It’s a standalone library that you can easily import into any Android app, and it seamlessly adds fast-scrolling, sorting, and sectioning. Plus, it looks great on both Android 4.0 and pre-4.0 devices, on tablets and phones.

SuperSaiyanScrollView on HTC Magic (Eclair) and Galaxy Nexus (Jelly Bean)

SuperSaiyanScrollView on HTC Magic (Eclair) and Galaxy Nexus (Jelly Bean)

Why “Super Saiyan”? Because:

  1. I made it, so I get to name it.
  2. It’s super-fast, super-powerful, and it kicks (stock) Android’s ass.
Their power levels are definitely over 9000.

Their power levels are definitely over 9000.

Usage

The SuperSaiyanScrollView code attemps to be as unobtrusive as possible. To use it, you just need to wrap your existing ListView in a SuperSaiyanScrollView and your existing Adapter in a SectionedListAdapter.

In your layout XML file, add a SuperSaiyanScrollView around your ListView:

    <com.nolanlawson.supersaiyan.widget.SuperSaiyanScrollView
      android:id="@+id/scroll"
      android:layout_width="match_parent"
      android:layout_height="match_parent">

      <ListView
        android:id="@android:id/list"
        android:layout_width="match_parent"
        android:layout_height="match_parent"
        android:scrollbars="none"
        />

    </com.nolanlawson.supersaiyan.widget.SuperSaiyanScrollView>

(I like to set android:scrollbars="none", to remove the omnipresent gray scrollbars and stick with the “fast” blue scrollbars.)

Next, wrap your existing Adapter (e.g. an ArrayAdapter) in a SectionedListAdapter. The SectionedListAdapter uses a fluent “builder” pattern, similar to AlertDialog.Builder:

    SectionedListAdapter<MyCoolAdapter> adapter = 
        SectionedListAdapter.Builder.create(this, myCoolAdapter)
        .setSectionizer(new Sectionizer<MyCoolListItem>(){

          @Override
          public CharSequence toSection(MyCoolListItem item) {
            return item.toSection();
          }
        })
        .sortKeys()
        .sortValues()
        .build();

To include the SuperSaiyanScrollView in your Android app, simply follow these steps:

  1. Check out the code from GitHub:

    git clone https://github.com/nolanlawson/SuperSaiyanScrollView.git
    
  2. If you use Eclipse/ADT, go to Import -> Existing Android Code -> and choose the SuperSaiyanScrollView/library/ folder.
  3. If you use Proguard, add the following to your proguard.cfg:

    -keep class com.nolanlawson.supersaiyan.widget.** { *; }
    

For more information on importing library projects, read this section of the Android developer guide.

Examples

I’m going to walk through some short examples, which should demonstrate the simplicity and flexibility of the SuperSaiyanScrollView. The source code for these apps is included in the GitHub project, and you can download the APKs here:

Example #1: Countries

In this example, we have a list of countries, which we’d like to sort by continent. The finished app looks like this:

Example 1: Countries

We have a simple Country object:

public class Country {

  private String name;
  private String continent;

  /* getters and setters ... */
  
  @Override
  public String toString() {
    return name;
  }
}

We use a basic ArrayAdapter<Country> to display the countries:

ArrayAdapter<Country> adapter = new ArrayAdapter<Country>(
        this, 
        android.R.layout.simple_spinner_item, 
        countries);

Next, we wrap it in a SectionedListAdapter. In this case, we’d like to section countries by their continent, sort the continents by name, and sort countries by name:

    sectionedAdapter = 
        SectionedListAdapter.Builder.create(this, adapter)
        .setSectionizer(new Sectionizer<Country>(){

          @Override
          public CharSequence toSection(Country input) {
            return input.getContinent();
          }
        })
        .sortKeys()
        .sortValues(new Comparator<Country>() {
          
          public int compare(Country lhs, Country rhs) {
            return lhs.getName().compareTo(rhs.getName());
          }
        })
        .build();

A Sectionizer is a simple callback that provides a section name for the given list item. In your own code, this might be a HashMap lookup, a database query, or a simple getter (as in this example).

Notice also that the keys (i.e. the section titles) and the values (i.e. the list contents) can be sorted independently, or not sorted at all. By default, they’re sorted according to the input order.

Now, let’s try to change the sections dynamically! In the action bar, the user can switch between alphabetic sorting and continent sorting:

alphabetic sorting vs. continent sorting

To do so, we first get a reference to the SuperSaiyanScrollView:

SuperSaiyanScrollView superSaiyanScrollView = 
    (SuperSaiyanScrollView) findViewById(R.id.scroll);

Then, we call the following function whenever the user chooses alphabetic sorting:

  private void sortAz() {

    // use the built-in A-Z sectionizer
    sectionedAdapter.setSectionizer(
        Sectionizers.UsingFirstLetterOfToString);

    // refresh the adapter and scroll view
    sectionedAdapter.notifyDataSetChanged();
    superSaiyanScrollView.refresh();
  }

Notice that the SectionedListAdapter and SuperSaiyanScrollView need to be informed whenever their content changes.

Next, when the user switches back to continent sorting, we call this function:

  private void sortByContinent() {

    // use the by-continent sectionizer
    sectionedAdapter.setSectionizer(new Sectionizer<Country>(){

          @Override
          public CharSequence toSection(Country input) {
            return input.getContinent();
          }
        });

    // refresh the adapter and scroll view
    sectionedAdapter.notifyDataSetChanged();
    superSaiyanScrollView.refresh();
  }

Notice that you never need to call adapter.sort() or Collections.sort() yourself. The SectionedListAdapter handles everything. And it does so without ever modifying the underlying adapter, which means that view generation is lightning-fast.

Example #2: Pokémon

This example shows off some of the advanced functionality of the SuperSaiyanScrollView. We have three different sortings, the size of the overlay box changes to fit the text size, and we can dynamically hide both the overlays and the section titles.

alphabetic vs by-region sorting

First off, the size of the overlay can be configured in XML. In this example, we start off with a single-letter alphabetic sorting, so we want the overlays to be a bit smaller than normal.

Add a namespace to the root XML tag in your layout XML:

<RelativeLayout
  ...
  xmlns:myapp="http://schemas.android.com/apk/res/com.example.example1"
  ...
  >
</RelativeLayout>

Next, use values prefixed with ssjn_ to define the size of the overlay:

<com.nolanlawson.supersaiyan.widget.SuperSaiyanScrollView
  ...
  myapp:ssjn_overlaySizeScheme="normal">

  <ListView
    ...
    />

</com.nolanlawson.supersaiyan.widget.SuperSaiyanScrollView>

I include the built-in schemes small (for one letter), normal (for most use cases), and large and xlarge (for longer section titles). Section titles of up to two lines (separated by \n) are supported.

Small, normal, large, and xlarge overlays in my AMG Geneva app.

Small, normal, large, and xlarge overlays in my AMG Geneva app.

If you want, you can also manually specify the font size, width, height, and text color yourself:

<com.nolanlawson.supersaiyan.widget.SuperSaiyanScrollView
  ...
  myapp:ssjn_overlayWidth="400dp"
  myapp:ssjn_overlayHeight="200dp"
  myapp:ssjn_overlayTextSize="12sp"
  myapp:ssjn_overlayTextColor="@android:color/black" >

  <ListView
    ...
    />
</com.nolanlawson.supersaiyan.widget.SuperSaiyanScrollView>

Now, in the Java source, we have a PocketMonster object:

public class PocketMonster {

  private String uniqueId;
  private int nationalDexNumber;
  private String type1;
  private String type2;
  private String name;
  
  /* getters and setters */

  @Override
  public String toString() {
    return name;
  }
}

We have a simple PocketMonsterAdapter to define how the monsters are displayed in the list:

public class PocketMonsterAdapter 
    extends ArrayAdapter<PocketMonster> {
  
  // Constructors...
  
  @Override
  public View getView(int pos, View view, 
      ViewGroup parent) {
    
    PocketMonster monster = 
        (PocketMonster) getItem(pos);
    
    /* Create and style the view... */

    return view;
  }
}

We wrap this adapter in a SectionedListAdapter that, by default, sections and sorts everything alphabetically:

    adapter = SectionedListAdapter.Builder.create(this, subAdapter)
        .setSectionizer(Sectionizers.UsingFirstLetterOfToString)
        .sortKeys()
        .sortValues(new Comparator<PocketMonster>(){

          @Override
          public int compare(PocketMonster lhs, 
                PocketMonster rhs) {
            return lhs.getName().compareToIgnoreCase(
                rhs.getName());
          }})
        .build();

Notice that we call both sortKeys() and sortValues(), because we want both the section titles and the Pokémon to be ordered alphabetically. Since PocketMonster does not implement Comparable, we defined a custom Comparator.

Now let’s say we want to organize the Pokémon by region:

Pokémon sorted by region.

Some quick background: Pokémon are ordered by their “national ID,” an integer value that starts at 1 (Bulbasaur) and goes up to 718 (Zygarde). Every time Nintendo releases a new generation of Pokémon games, they add about 100 new monsters, set the game in a new “region,” and sell about a bazillion new Pokémon toys.

So basically, we can determine the regions from the Pokémon’s ID. We’ll define a new
Sectionizer, which is called when the user selects “sort by region”:

  private void sortByRegion() {
    adapter.setSectionizer(new Sectionizer<PocketMonster>() {

      @Override
      public CharSequence toSection(PocketMonster input) {
        int id = input.getNationalDexNumber();
        
        // Kanto region will appear first, followed 
        // by Johto, Hoenn, Sinnoh, Unova, and Kalos
        if (id <= 151) {
          return "Kanto (Generation 1)";
        } else if (id <= 251) {
          return "Johto (Generation 2)";
        } else if (id <= 386) {
          return "Hoenn (Generation 3)";
        } else if (id <= 493) {
          return "Sinnoh (Generation 4)";
        } else if (id <= 649) {
          return "Unova (Generation 5)";
        } else {
          return "Kalos (Generation 6)";
        }
      }
    });

    // uses the nat'l pokedex order, since 
    // that's the original input order
    adapter.setKeySorting(Sorting.InputOrder);
    adapter.setValueSorting(Sorting.InputOrder);
    scrollView.setOverlaySizeScheme(
        OverlaySizeScheme.Large);

    // refresh the adapter and scroll view
    adapter.notifyDataSetChanged();
    scrollView.refresh();
  }

Notice that we’ve changed the key and value sorting to Sorting.InputOrder, because now we want to order Pokémon by their national IDs, which was the order the data was read in. (A custom Comparator would have also done the trick.) Additionally, we’ve increased the size of the overlay to accommodate the longer section text.

Now, let’s say we want to organize Pokémon by type. Each Pokémon has at least one elemental type (such as “fire” or “water”), but some have two. Ideally we would like to list Pokémon in multiple categories, so they could appear multiple times in the list.

To do so, we will define a MultipleSectionizer instead of a regular Sectionizer:

  private void sortByType() {
    adapter.setMultipleSectionizer(
        new MultipleSectionizer<PocketMonster>() {

      @Override
      public Collection<? extends CharSequence> toSections(
          PocketMonster monster) {
        String type1 = monster.getType1();
        String type2 = monster.getType2();

        if (!TextUtils.isEmpty(type2)) { // two types
          return Arrays.asList(type1, type2);
        } else { // one type
          return Collections.singleton(type1);
        }
      }
    });
    adapter.setKeySorting(Sorting.Natural);
    adapter.setValueSorting(Sorting.InputOrder);
    scrollView.setOverlaySizeScheme(OverlaySizeScheme.Normal);

    // refresh the adapter and scroll view
    adapter.notifyDataSetChanged();
    scrollView.refresh();
  }

Notice that the key sorting has again changed, this time to Sorting.Natural, which simply sorts alphabetically. Value sorting has changed to Sorting.InputOrder, because we’ve decided to sort Pokémon by their national IDs.

This works as expected:

Pokémon sorted by type.

Notice that Charizard appears in both in the “Fire” and “Flying” sections, since he has two types.

This example app also shows how you can disable the section titles or section overlays, just in case you don’t like them. These values can also be set during the Builder chain, using hideSectionTitles() and hideSectionOverlays().

comparison of hiding overlays and hiding section titles

You can read the Java documentation for more information about customizing the SuperSaiyanScrollView and the SectionedListAdapter.

Summary

The SuperSaiyanScrollView is a cool new library, and you should be using it. File bugs on me ‘n’ stuff, if there are any missing features you’d like to have.

Creating a contact with multiple fields in Android

For the impatient: skip the article, download the code.

Recently, when writing a physician directory for the Canton of Geneva, I wanted to include a feature for adding a new contact. That is, I wanted a button that would pop up the “Add a new contact” screen, with various fields (such as phone number, postal address, and email address) already filled in. Piece of cake, right?

Adding a contact in the physicians app.

Adding a contact in the physicians app.

Unfortunately, it turns out that the Android docs and Stack Overflow are pretty bereft of clear, concise instructions for creating a contact with multiple fields of various types, e.g. work phone, mobile phone, or home fax (if such a thing still exists).

Plus, the entire ContactsContract changed in API level 11 (Honeycomb), meaning that anything written for ICS or Jelly Bean wouldn’t work in Gingerbread, and vice-versa. Oh joy.

Luckily for you — assuming you stumbled across this post after a frustrated trip to Google — I’ve written a helper class to do all the heavy lifting. It provides a simple, fluent API that works for Android version 2.1 (Eclair) through 4.2 (Jelly Bean), and it’s open source.

You create a contact like this:

Intent intent = new AddContactIntentBuilder("Joe Blow")
    .addFormattedAddress("123 Fake Street, Springfield USA",
        StructuredPostal.TYPE_HOME)
    .addPhone("555-867-5309", Phone.TYPE_HOME)
    .addPhone("555-123-4567", Phone.TYPE_WORK)
    .addPhone("555-987-6543", Phone.TYPE_FAX_WORK)
    .addEmail("joe.blow@gmail.com", Email.TYPE_HOME)
    .addEmail("joe@blow.com", Email.TYPE_WORK)
    .build();

startActivity(intent);

And here’s what this code produces, in both Jelly Bean and Gingerbread:

Adding a contact in Jelly Bean and Gingerbread.

Adding a contact in Jelly Bean and Gingerbread.

Happy contact creating!

Download or fork the code from GitHub.

KeepScore version 1.2.2: you asked for it, you got it

My favorite part about working on a software project with real-world users is the feedback I get. It’s often said by industry veterans that you don’t know what kind of app you’re building until your users actually get their hands on it, and the wisdom of this statement has proven itself to me over and over.

With KeepScore, the app itself is pretty simple – it just keeps score. And each time I write an update, I tell myself, “Welp, that’s about all it’ll ever need.” Then I get an email from an interested user with a cool new use case, and I just can’t help but code it up.

So the app keeps growing and growing, but at each step I have to be extra-careful to keep the UI itself streamlined, simple, and dead-easy to use. With KeepScore version 1.2.2 (released today), I think I’ve managed to strike a good balance between functionality and usability.

Here are the new features:

Share

As many of you requested, you can now share your KeepScore games with a friend. You can send a single game, specific games, or all your games.

Just choose the games you want, hit the “Share” button up top, and KeepScore will create a special XML file that a friend can open with KeepScore on their own device.

The "Share" feature.

The “Share” feature.

This feature also allows you to back up your saved games to Dropbox, Google Drive, or your favorite cloud storage service.

Automatic backups

Speaking of backups, there’s no more do-it-yourself! KeepScore automatically saves a backup whenever you start a new game. Look for them in the “Restore” popup.

All your games are automatically backed up.

All your games are automatically backed up.

These files are gzipped, so they take up a minimal amount of space on your external storage.

Export spreadsheet

As board gamers, we’re geeks. And as geeks, we love analyzing our board game habits in a number of different ways. Who wins the most games? Who’s scored the most points? What games do we play the most often?

The "Export Spreadsheet" feature.

The “Export Spreadsheet” feature.

Rather than create a separate screen to answer each of these questions, KeepScore now offers an “Export Spreadsheet” feature. The spreadsheet may be imported into Excel, LibreOffice, Google Docs, or any document editor that accepts CSV files.

Data nerds rejoice.

Data nerds rejoice.

Once you’ve opened up the spreadsheet, you can slice and dice the data to your geeky heart’s content.

More Holo goodness

KeepScore 1.2.2 expands support for the Android “Holo” theme, which means it will look more beautiful and more consistent across different Android devices.

Holo everywhere.

Holo everywhere.

Additionally, I’ve revamped the default “Light” theme to be more clean and minimalist. It’s inspired by the “card” interface from Google Now, which I adore.

The new, Holo-style look.

The new, Holo-style look.

And if you’re scared by change, the old look is still available in the settings under Color Scheme -> Classic Light.

The classic look.

The classic look.

Whose turn is it?

A perennial complaint from users is that it’s hard to know if you’ve forgotten to add a player’s score. For round-based games (like Hearts) or games where the scoring order is important (like cribbage) this can be a real nuisance.

KeepScore 1.2.2 solves this problem using a clever suggestion from my buddy Alex Lougheed: add a little bullet icon to show which player was updated last. This means you can go player-by-player, totaling up the individual scores, without ever losing your place.

The blue bullet indicates who was scored last.

The blue bullet indicates who was scored last.

And if you’re playing a game where the player order doesn’t matter, you can disable the bullet in the settings.

Zoom in on the chart

On many devices, the history chart doesn’t show up very well, because it either gets cut off or it’s too small to see. Rather than fiddle with the presets for every possible screen size, I’ve added some handy zoom in/zoom out buttons.

Zoom in, out, and all around.

Zoom in, out, and all around.

Of course, pinch-to-zoom would be even nicer, but this works in a pinch (no pun intended!).

Internationalization

As always, KeepScore is localized into French and Japanese by yours truly. The German translation is out of date, though, and no other languages are currently supported.

Parlez-vous nippon?

Parlez-vous nippon?

According to the Play Store statistics, the top languages of KeepScore users are:

  1. English (United States)
  2. English (United Kingdom)
  3. French (France)
  4. English (Canada)
  5. German (Germany)
  6. English (Australia)
  7. Japanese (Japan)
  8. Dutch (Netherlands)
  9. Italian (Italy)

So if you speak German, Dutch, or Italian, and if you have some free time, please offer a translation!

Donate

This isn’t really a new feature, but I’ve added a Donate version of KeepScore to the Google Play store for $2.99.

Since I started work on this app, many people have asked where they could throw some change in my jar. But I resisted adding a Donate button, because after all, it’s just a counting app.

Recently, though, I noticed that the number of code commits to the KeepScore repository has actually surpassed any other Android app I’ve written (even CatLog and Pokédroid!). So I’ve had to admit to myself that this little counting app has morphed into quite the serious project.

So if you’d like to support KeepScore, you can download the Donate version from the Google Play Store, or just donate via PayPal.

Rest assured, though, that I will continue working on KeepScore regardless of your donations. For me, it’s just a fun app to write, and plus there’s still a lot of work to do. Next up: colors per player and battery-saving enhancements.

KeepScore version 1.2: more style, more substance

KeepScore v1.2

I had always thought of KeepScore as a fairly simple app. Functional, yes. But beautiful? Meh.

It’s a counting app. Counting apps only have to do one thing right, and that’s count. This is not brain surgery, people. Just keep it simple, and you’re already 95% of the way there.

A few weeks ago, though, I decided to make KeepScore my guinea pig for trying out some new design elements from the “Holo” theme, introduced in Android 3.0. At the same time, I also added some fit-and-finish features that were sorely needed, giving the app a much more coherent feel.

The result is KeepScore version 1.2, probably the biggest update I’ve ever written for the app. It looks and functions so differently now, I feel like I barely recognize my own app.

What I like most about this update, though, is that it adds a fresh coat of paint without subtracting anything from the usability. In fact, I think KeepScore is actually much easier to use than it was before, to the point where I feel a little embarrassed for having bragged about it in previous posts.

New home screen

The new home screen is a design I’ve been wanting to do for awhile. Here’s a side-by-side comparison of the old and new looks:

Out with the old, in with the new.

The new design basically takes the “Load Game” screen and transplants it onto the welcome screen. I find it’s a huge improvement. There was a ton of wasted space with the old design, and plus it took two clicks to get to your saved games. Now everything the user needs is front and center, without sacrificing any usability or app branding.

I also wanted to make sure that the new design wasn’t so cluttered that it would confuse first-time users. Their experience is still pretty streamlined: there’s a big “New Game” button the size of a barn that you can’t possibly miss.

Big gray squares. Your thumb is drawn to them.

The new home screen also makes use of the “Action Bar” paradigm, which was introduced in Android 3.0 and back-ported thanks to the wonderful Action Bar Sherlock library.

The in-game view

In-game, not a whole lot has changed. If it ain’t broke, why fix it? All I added was a very small graphical flourish:

Never change, KeepScore. Never change.

Did ya miss it? The last score in the score history now has a “fade-out” gradient, to indicate that the list has been cut off at the bottom.

This is to solve a common problem I heard from users, which is that they could never remember whether the list was ordered top-down or bottom-up. Hell, I kept forgetting myself! So hopefully this subtle change will make that clearer.

Rematch button

This is something I struggled with for a long time. In early versions of KeepScore, I had a “Reset” button, which prompted the user with “Overwrite game or start new game with same players?” Knowing that users don’t read anything, though, I was unsatisfied with this dialog.

The old, confusing dialog.

In later versions, I replaced it with “Reset” and “Copy Game”:

“Reset” and “Copy Game” buttons.

Now I’ve combined them both into “Rematch”:

New “Rematch” button.

What I realized about “Reset” and “Copy Game” is that they’re an inelegant solution to a common problem. 99% of the time, if you’re still using the app after the game is over, it’s because you want to start a new game with the same players. However, I didn’t want users to overwrite their old scores, because then they’d lose all their history from the previous game. Hence the option of copying the game before resetting it.

“Rematch” captures this concept much more succinctly than “Copy Game” and “Reset.” And plus, it makes it more difficult for users to shoot themselves in the foot, i.e. by overwriting their scores.

Unfortunately I can’t take the credit for this idea. I borrowed it from Rounds, which is a pretty slick round-based score keeper that was actually originally built on KeepScore’s source code. When I saw the “Rematch” button in that app, I slapped myself on the forehead and wondered how I’d never thought of it.

Edit Players

This is a pretty nifty new feature. In the previous versions, I had an “Add Player” button and a “Shuffle” button, but there was no way to manually reorder players or delete players.

Every day I’m shuffling, and adding, players.

Now all of that is handled in a separate “Edit Players” screen, which makes it a breeze to change players mid-game. You can even touch and drag to get the order exactly right.

Clearly, Storm Eagle should go after Mega Man.

This screen also makes it easier to change players’ names. Previously, the only way to do that was to long-press on a player’s name, which is kind of low on discoverability. But hopefully the button with the pencil icon is a lot easier to figure out.

A tip of my hat goes to Carl Bauer for the drag-and-drop list implementation.

History chart

One occasionally-requested feature was a line chart to show the players’ scores over time. Well, ask and ye shall receive:

Fact: nerds love data. And gamers are all nerds.

Players’ scores are on the Y axis, rounds on the X axis. It’s probably useless for any non-round-based game, but kind of neat nonetheless.

I realize the history chart is probably the most unpolished out of the new visual features I added. The colors are pretty bland, and it’s all very MS Paint-esque, because Android has no native graphing library, so I had to whip this up from scratch. But I’m not too concerned, since most people don’t bother going into the History anyway. And for those that do, I think it’s a nice little feature.

Other new features

Besides all the UI changes, I also added some new functionality:

  • Backup/restore. Back up your games to an XML file on USB storage, and load them later. Duplicates are handled automatically based on unique game IDs.
  • Undo/redo. Self-explanatory. Any action in-game can be undone or redone, i.e. scores subtracted, scores added, etc.
  • Better German translations. Germany is the Mecca of modern-day board gaming, so this has got to be worth something. The app is already available in French and Japanese.
  • Dropped support for pre-Eclair devices. Android 1.5 and 1.6 only account for 0.5% of the user base, and the new backup/restore feature required some XML libraries from Eclair. Sorry, Cupcake and Donut! You were delicious while you lasted.

So there you have it. KeepScore v1.2 has a fresh new look, a better UI, and it’s still free and open-source. So go grab it from the Google Play Store!

CatLog jives with Jelly Bean, goes open-source

CatLog

CatLog is an app I’ve always been immensely proud of. I wrote the initial version in the span of a weekend, and yet it grew to be my second-biggest Android app, after the now-defunct Pokédroid. Even though it’s a pretty esoteric app, and nobody except developers will find it very useful, I’m glad I could contribute something valuable to the Android community and help make Android development a bit less of a pain. It’s cool to see fan-made instructional videos on YouTube and all the forum posts where people say, “Just download CatLog and send me a log report.”

But lo, all is not well in CatLog Land. As of the newest version of Android (4.1 Jelly Bean), Android apps can no longer read each other’s logs using the READ_LOGS permission. You’re limited to your own logs, unless you’re a system app or you gain root privileges. Uh oh.

Now, this is a defensible position on Google’s part. After all, there was a pretty high-profile security hole found in the Facebook Android SDK due to developers carelessly writing sensitive information to the system log. And in general, most apps don’t need to read each other’s logs, so the change is understandable. Stay in your own sandbox and all that.

This change is going to have a big impact on certain varieties of apps, though. Not only will it affect log-reading apps (like CatLog and aLogcat), but also apps that rely on log-reading in some way. For instance, you can say goodbye to the various “app lock”-type programs that rely on reading the system log to determine when other apps are being launched. If you don’t believe me, check out the permissions page for those apps. See where it says “read sensitive log data”? That’s the death knell for these types of apps, unless somebody figures out a smarter way to detect when another app is launched. (My own AppTracker works in the same way. So it’s toast as well.)

So what does this mean for CatLog? Well, in the future, it means it will only work on rooted phones, which basically limits its appeal to developers and root-happy techies. Until now, it had also come in handy for end users, since it gave them a way to easily submit bug reports (in cases where, for whatever reason, the default reporting mechanism wasn’t available). But starting with Jelly Bean, CatLog will require root access, which means it’s basically worthless for Joe Android User now.

So given that this is more or less CatLog’s swan song, I’m taking a pretty radical step with it. I’m open-sourcing it. Yep, CatLog is now free to remix and re-use, released under the ultra-permissive WTFPL license, just like my other apps.

Why such a permissive license? Well, because I honestly don’t care. CatLog was always a free app, and although I’m grateful for the nice pocket change I make from the donate version (about $20 per month), I doubt open-sourcing it will affect the donations much, and anyway the app was never about making money for me. So there’s really no reason to lock down the source code. I mean, yeah, there are already some copycat apps out there that stand to benefit, but they’re not really doing anyone any harm hanging out in sixth or seventh place in the search results. CatLog’s main advantage is its reputation on the Google Play Store.

On the other hand, if you do want to re-use CatLog’s code, the only thing I ask for is attribution. Sure, the WTFPL doesn’t require it, but this is just one of those “don’t-be-a-jerk” requests.

I have another strong reason for wanting to open-source CatLog: I’m bored of it. Frankly, I haven’t been able to give it much attention lately, because I think 99% of its useful features are finished, and everything that’s left is just flourishes and fine-tuning. It needs a facelift and probably some tweaks to the filter syntax, but with the enthusiasm I’ve shown for the app lately, I’m obviously just not the one to do it.

Also, I find myself turning away from Android development in general. I started writing Android apps when the system was still in its infancy, with only two phones available – the HTC Dream and the Magic. I found it a lot more fun when Android was still simple and untamed, when the market wasn’t flooded with glitzy, polished apps all competing for users’ mind-share. Back in those days, you could even write a simple Pokémon app with an ugly UI and people would love you for it. Development was easy, and the exposure was fun.

Nowadays the Play Store is much more crowded, and Android development is more difficult in general, what with supporting hundreds of devices with multiple form factors (including tablets), and multiple Android versions stretching from 1.5 Cupcake to 4.1 Jelly Bean. The APIs have grown incredibly complicated, and I can’t count the number of times I’ve discovered bugs that only appeared on a certain Android version or on a certain phone. It’s a huge headache trying to maintain all this compatibility, which is why I still haven’t updated any of my apps to the new “Holo” theme from ICS.

However, my lack of enthusiasm shouldn’t limit CatLog’s potential. When you’ve lost interest in a software project, I think it’s your duty to make it open-source, so that somebody else has a chance to grab the baton and run with it. And that’s exactly what I’m doing with CatLog. So if you have any features or bugfixes you’d like to write, fork me on GitHub and go nuts!